Pilates is about centering, literally and figuratively — building core strength and finding one’s metaphorical center, one’s sense of inner strength and calm. The practice incorporates timing, shape and breath in reaching toward achieving goals in both areas — things that dancers are accustomed to working with and refining. Core strength (which we know goes beyond “washboard abs” — it’s about strength and integration of the muscular structure from the collarbones to the glutes) is essential to strong technique and confident artistry. A key example is finding one’s “center” for clean pirouettes. Dance technique in itself doesn’t get us there, hence the need for “cross-training” (practicing other movement forms for balanced fitness).
On that metaphorical level, dancers need a different kind of “core” strength — the kind of of inner strength that allows one to stay focused and committed through long days, hectic weeks, shifting schedules, side jobs, financial stress, the sometimes difficult journey journey to finding who one is as an artist and a thousand other stressful aspects of artists’ lives. Pilates has a mindful aspect that, similar to yoga, leaves space for practitioners observing how they act and react through learning and practicing the form. It focuses on breath and inner sensation, for example. Honing in on such elements can be profoundly calming, as well as informative.
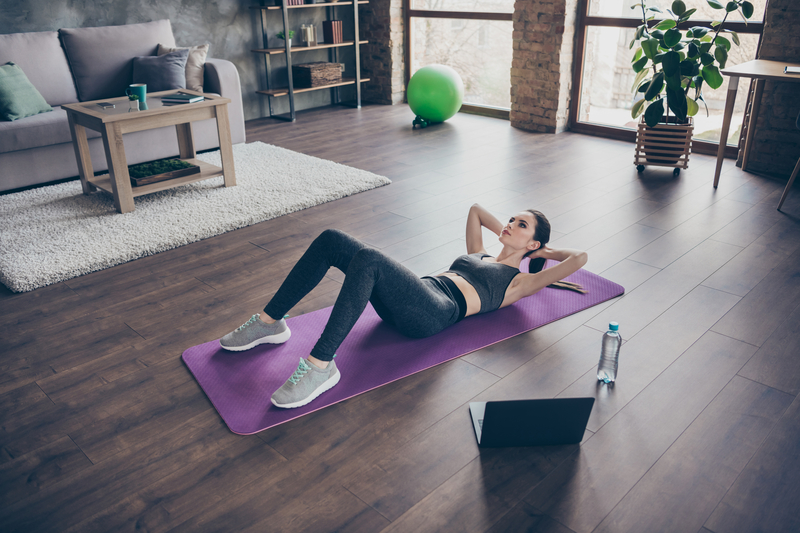
In a time of social and economic upheaval, due to the outbreak of COVID-19, dancers could use an exercise form that brings that sort of calm. Bonus: it can be done with little equipment and space, with or without music. A thick mat is helpful, yet a soft carpet can also do the trick. The following Pilates sequence offers a centered calm and strength, as well as helping to build literal core strength, adaptable to various kinds of space and time. We hope that you enjoy it. Keep calm and practice on, keep moving and creating!
#1. Co-contraction: Keying into core strength, placement and integration
1. Lay on your back with your knees bent and your feet planted directly under them. Place your hands by your sides, palms down — yet if you want to move your hands up toward your stomach or chest at any point of this step, in order to feel your breath or core muscles working, feel free to do so.
2. Feel your lower belly and pelvic muscles engaging to keep your back fully flat on the mat. This is called “co-contraction” (muscles contracting together).
3. Scoop your lower belly in and point your tailbone toward the back of your knees — lifting ever so slightly, no more than an inch. With Pilates, less can truly be more! Breathe in as you do so. (That said, throughout this sequence, if the given breath sequence doesn’t feel natural to you, breathe in a way that does.)
4. As you breathe out, shift your tailbone so that it points downward, until you have a slight arch in your lower to middle back (slight enough that you could just about slide one of your hands under that arch — go ahead, try it, if you’d like!). Try to begin a smooth, rhythmic flow of breath with this step.
5. Shift back to where your tailbone is pointing at the back of your knees, and repeat those two steps above, 10-15 times. Key into what it feels like to move through these two positions and the muscular path that sequence engages. These are muscles that you’ll be engaging throughout this sequence (and Pilates practice more generally). Key into your breath pattern, and what it feels like to breathe in a fluid, rhythmic manner. Notice what it’s like to feel centered.
#2. Bridge Roll-Ups
1. From your tailbone pointing toward the back of your knees, as in the last step, raise your hips until you’re resting on only your shoulders (your back is almost all the way off your mat) and you’re making a slope from your knees to your collarbones. You’re essentially keeping that same pattern of pelvic tilting, just making it bigger. Keep the same breath pattern, as well, if it feels right for you.
2. Roll all the way back down, engaging deep core muscles so that you feel every vertebra in your spine hit the mat individually. Notice what that engagement feels like. To end, tilt your pelvis downward so that you have that small arch in your back.
3. Repeat that 5-10 times, slowly and mindfully. The tortoise, and not the hare, wins the race in Pilates. See if you can enjoy the feeling of coordinating your breath and movement. See if you can enjoy feeling your center — physically, mentally and emotionally.
*Level it up: Extend one foot forward, flexing it, lower leg on a slight diagonal, and then lower it back down once you’re in bridge, alternating feet with each bridge.
#3. Leg Circles
1. With your back flattened into your mat (“co-contracted”), raise your left leg to the sky. Point your raised foot and turn that leg out (from the hip and not the knee). Check in with your back, ensuring that nothing has changed with adjusting your left leg. It should stay still and stable throughout the whole exercise.
2. Make a small circle on the ceiling with your left big toe, breathing in. Stop short (but with the least amount of tension possible) at the point where you started the circle, and breathe out quick and accented — matching the quick stop of the circle — at the same time.
3. Repeat that 10-15 times, and then change the direction of the circle. Periodically check in with your breath (aiming for rhythmic and not tense) and that only your left leg is moving; everything else still.
4. Place your left foot down, and repeat steps 1-3 with your right leg up and making the circles. Continue to enjoy feeling your literal and metaphorical center — it’s always there, we just don’t always tune into it.
*Level it up: Lengthen and turn out the leg that’s not doing the circles.
#4. Rolling-like-a-ball
1. Feeling centered includes keeping in touch with our sense of humor and play. A good belly laugh is also a great abdominal workout! To start this exercise bringing that, bring your knees into your chest. If it feels good, make some small, gentle circles with your knees to lightly massage your back.
2. When you’re ready, roll up to vertical — keeping your knees into your chest and maintaining a “c” shape in your upper body. Breathe in as you do so. For extra abdominal work, try not to let your toes touch the floor or mat below you.
3. Roll back down when you’re ready, sequencing back down through your vertebrae one by one. Breathe out, smoothly and easily.
4. Repeat that 10-15 times, allowing yourself to feel playful. Giggle, if that comes! To end, take any other small movements that feel good.
5. Check in with yourself. Do you feel centered, physically, mentally and emotional? How can you bring that feeling into the rest of your day, week and maybe even beyond?
*Level it up: Lengthen your legs in a narrow “V”, keeping the shape all throughout the “roll” yet also lengthening up through your spine as you come to vertical (also known as the “Open-Leg Rocker”).
By Kathryn Boland of Dance Informa.
Share this: